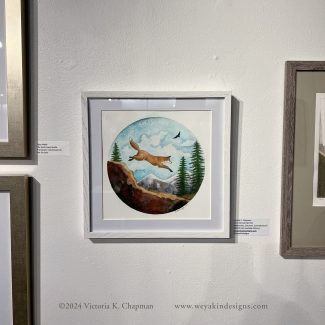
The art from the video framed and up on the gallery wall at the WSU Dolphin Gallery
A friend asked me for help on how to frame illustrations for a show. Since I thought it would be helpful for others as well, I put together this video to share how I frame and wire my illustrations. While illustrators aren’t always gallery artists, we do sometimes have the opportunity to show our work in galleries and other exhibitions. It’s important to know how to frame up your pieces for shows and how to wire it properly for hanging.
You’ll often find gallery shows and other events have specific instructions for framing that include “framed and wired for hanging”. It’s important you follow their instructions and make everyone’s lives easier.
This post outlines how to create a hinge mat, frame your piece, and wire the frame to be hung. It applies specifically to flat work on paper, such as watercolors, pen art on paper, digital art printed on paper, etc. If you’re framing pieces painted or printed on canvases or boards, you’ll need to find another framing method.
Watch the Video:
The Steps for Matting, Framing, and Wiring Art for Hanging:
Gather all of your materials
Create a hinge mat
Line up top of cut mat and backing board
Measure out hinging tape and cut
Place hinging tape across top inside of backing board and cut mat board
Flatten tape so it’s smooth
Fold mat board over onto backing board
Place art under mat board
Center art in your cut mat board
Carefully place photo corners on each corner of the art
Put art into frame
Open up frame back
Clean inside of frame glass (and let dry)
Place art inside from, face down onto glass
Be sure your art looks good from the front before closing it up
Place frame back back into frame and latch into place securely
Wire the frame for hanging
Find your desired placement of wire hanging brackets (mark with pencil if needed)
Hold bracket in place while screwing in screw to secure it
Repeat on the opposite side
Measure and cut your wire (leave extra on each end for securing)
Thread wire through bracket loops
Secure wire either with crimp tubes (squeeze into place with pliers) or by wrapping around itself until secure
Clean front of glass
Label back of your art as necessary according to gallery instructions
Materials List:
Your art
A frame appropriately sized for your art
A pre-cut mat board sized for your art
Backing board
Linen hinging tape (archival)
Photo corners (archival)
Framing wire, brackets, screws, and optional crimp tubes
The art being framed in this video is Sierra Nevada Red Fox and is available for purchase. Contact Me to purchase the original (including this frame). You can also buy prints and stickers of this piece in the online art shop.
Feel free to leave your questions or comments in the comment box below. Thanks for watching!
Various Measuring and Templating Tools for Artists
As illustrators and artists, there are a vast variety of tools at our fingertips that can make our work more interesting, easier, and more fun. This post is the first in a new series I’m writing called AN ARTIST’S TOOLBOX. The first topic for this series is about measuring and templating tools.
While many of us may prefer to freehand everything as much as possible because it feels more natural and more easy to go with the flow, there are also times where measuring and templating tools can not only help make measurements and shapes more accurate, they can also make our lives easier. In this post I’ll go through some of the measuring and templating tools I find myself using most often and some of their possible applications.
L-Square
L-Square ruler to create 90° angles.
The L-square as been one of the most helpful tools I own for measuring the initial dimensions of a piece, ensuring the corners are square and the horizontal and vertical lines are the same length. In the past, using only a ruler, I sometimes found myself with corners that weren’t quite square, resulting in one measurement being slightly longer than the other. Having to erase the initial lines and start over is just plain annoying. If you don’t notice your error until the piece is finished, it goes from annoying to downright frustrating. The L-square helps fix this measuring dilemma with nice precise square corners.
Draw one horizontal line and one vertical line all in one shot, making sure to mark where the end of your lines are. Then, flip the L-square around and do it again on the next two horizontal and vertical lines, lining up with the ends of the previous drawn lines. You end up with nice square corners and even lines!
I have an L-square from Blick that is 24” on one edge and 14” on the other edge. This is usually sufficient for my illustrations. But, squares come in many sizes, so consider what works best for your own work. Many places carry L-squares, including local hardware stores.
Benefits of the L-square:
90° square corners
Precise line measurements
Easier and faster to make accurate outlines for a new piece
BONUS: Metal squares are also helpful for creating a straight edge for cutting paper with an X-acto blade
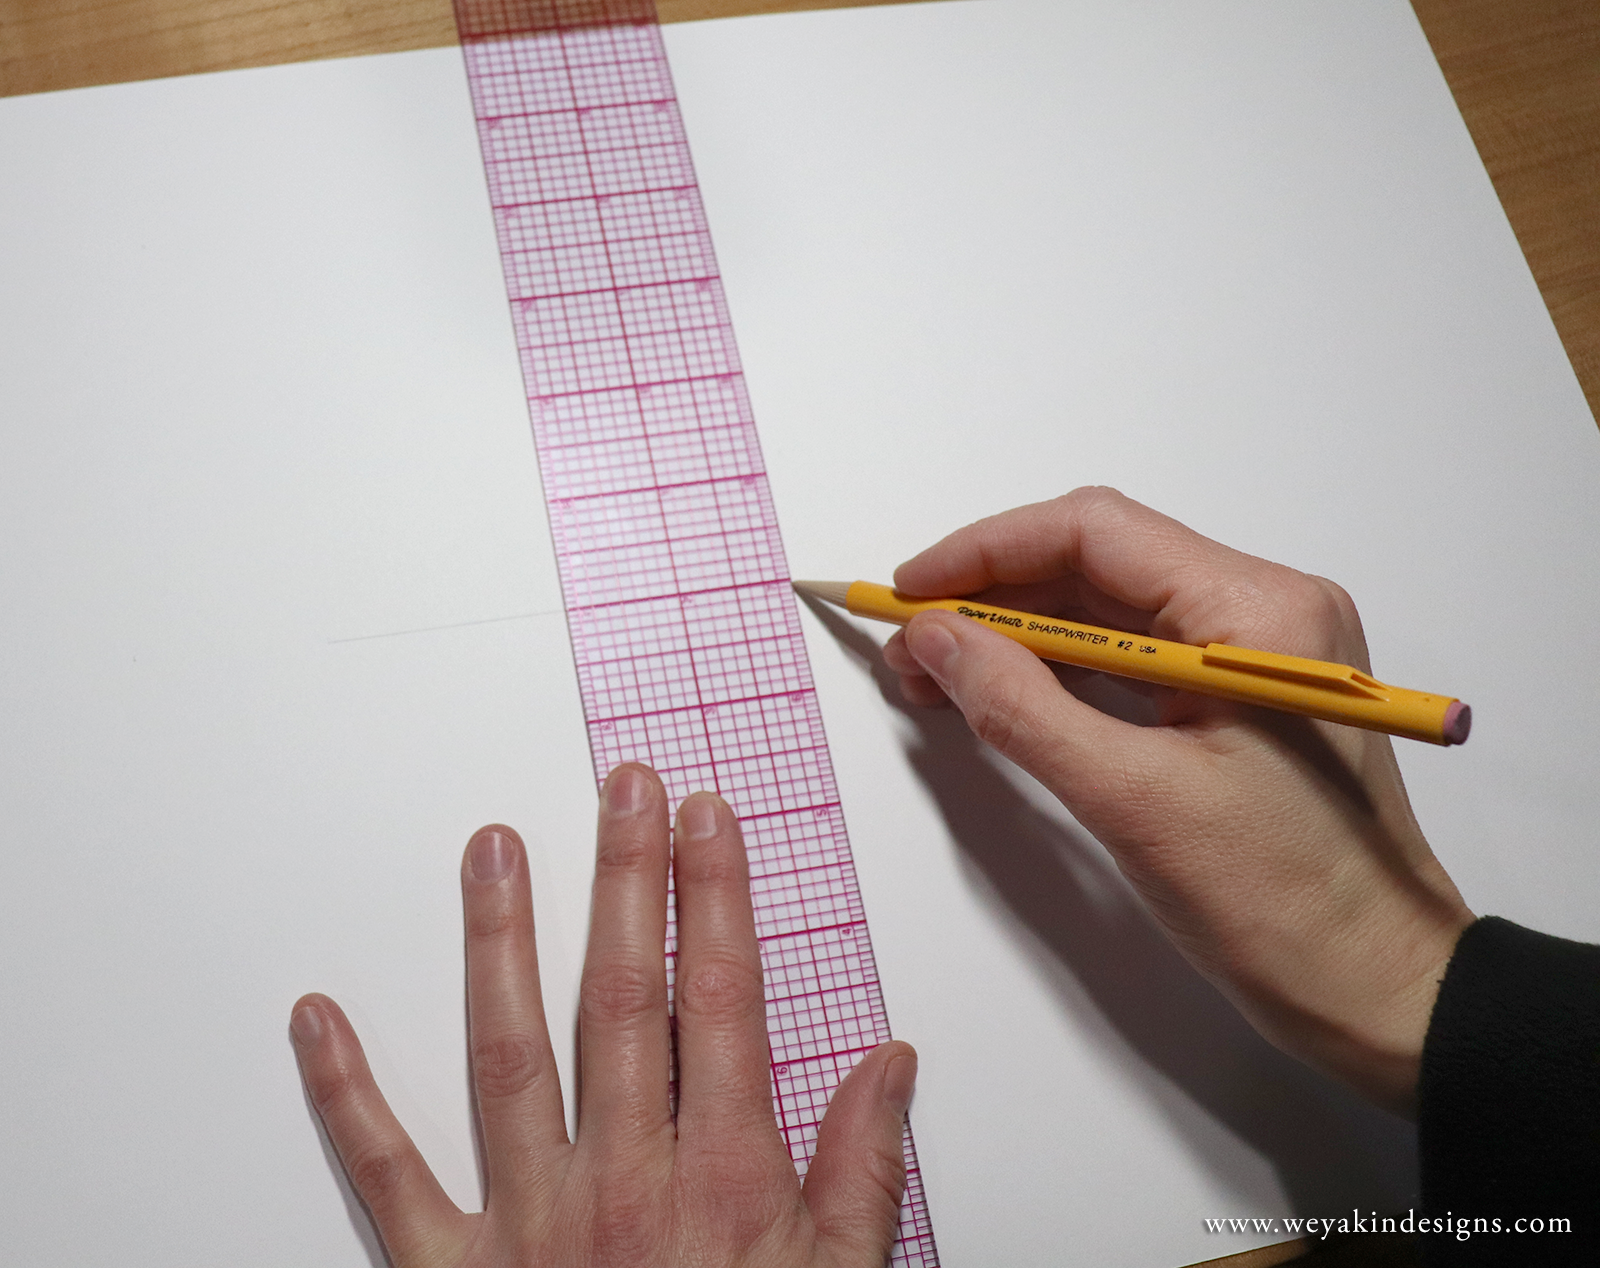
Clear Grid Ruler
Clear grid ruler made by Westcott to draw accurate lines.
The clear grid ruler has been one of my go-to rulers for many years. I find this variety of ruler more helpful than a standard solid-colored ruler. The see-through grid allows you to see your work beneath the ruler so you can more accurate place your lines and line up with previously drawn lines. I find it especially helpful for illustrations that involve a lot of linear shapes, such as houses, windows, and tables. They’re also helpful for creating the horizon lines when dealing with tricky perspective pieces.
I have an 18” long and 2” wide clear grid ruler made by Westcott. Check with your local art stores or order one online. I bought my very first one from the school co-op at my alma mater, the University of Connecticut and got many great years of use out of it before needing to purchase a new one.
Benefits of the Clear Grid Ruler:
See-through grid makes it easier to see your existing piece below the ruler
The grid allows you to line up with previously drawn lines
Helpful and faster for drawing linear objects such as houses, windows, doors, and furniture
Helpful and faster for drawing horizon lines for tricky perspective pieces
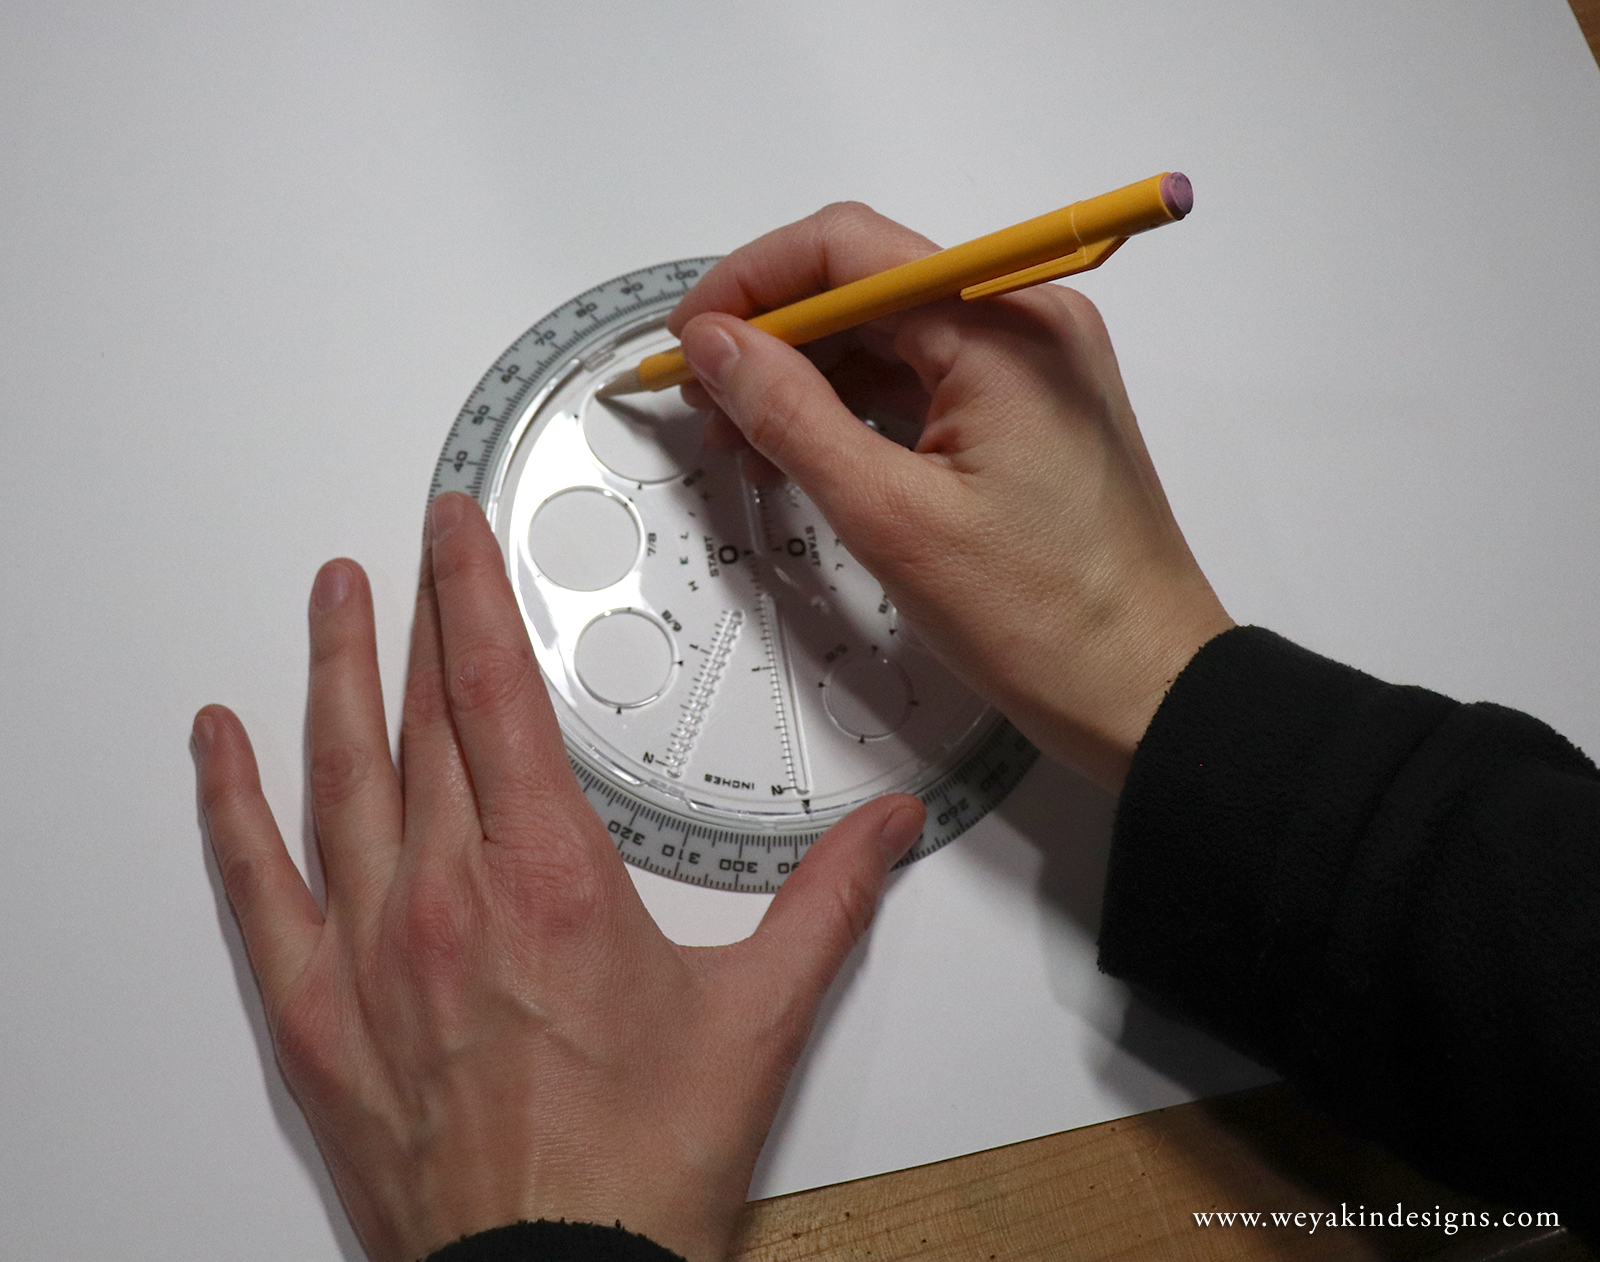
Circle Maker Tool
A circle maker tool made by Helix.
The circle maker tool is something I more recently discovered as a handy all-in-one circle templating device. It serves as a protractor, compass, and circle template so you can make accurate circles of many sizes, up to about 5.75” in diameter. I’ve found it helpful for drawing things like moons, balls, circles for containing a smaller drawing on the page, and other round objects. It’s especially nice when you need to make multiple circles that are all the same size.
I have the Angle and Circle Maker by Helix. Ask your local art store if they carry this sort of tool or you can order it from an online art store.
Benefits of the Circle Maker Tool:
Make many sizes of circles with one tool
Works as a protractor, compass, and template
Easy to make many circles that are the same size
Makes circle-drawing faster and more accurate
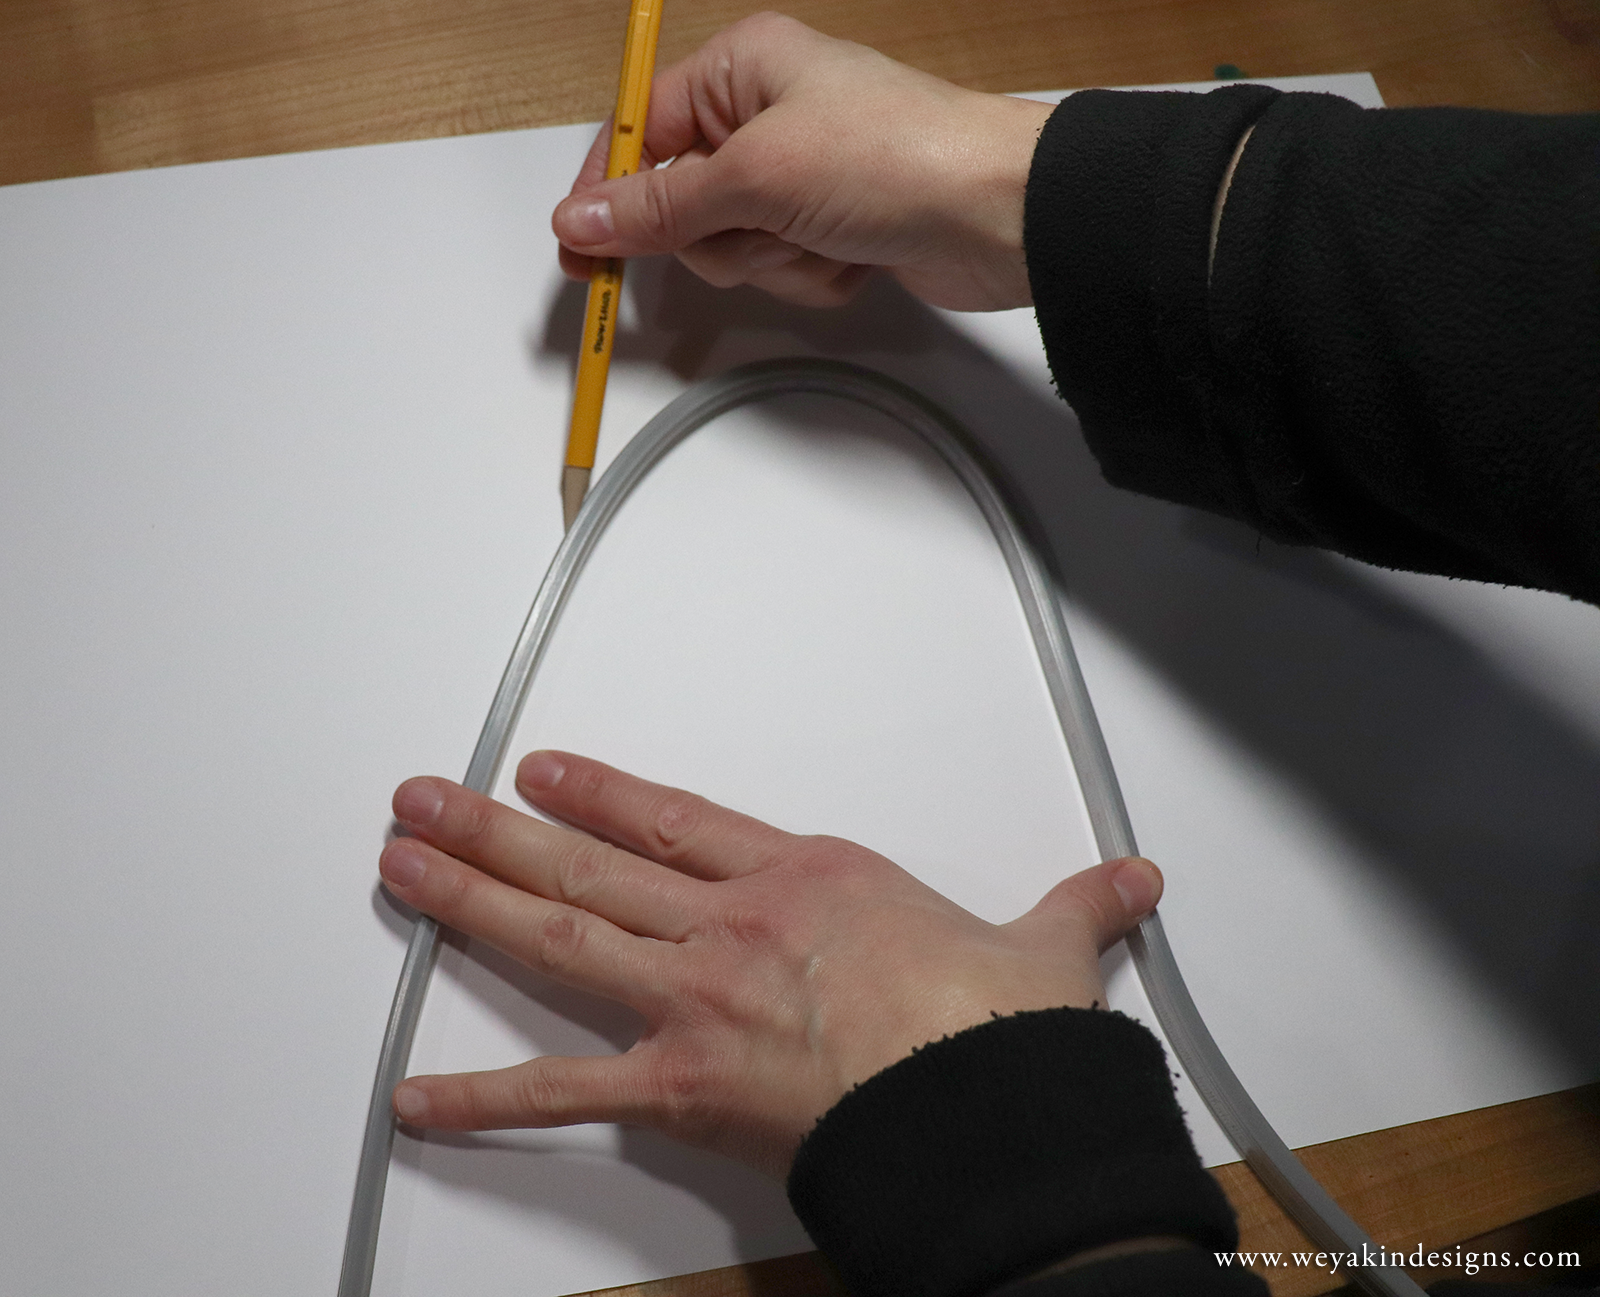
Flexible Curve
A flexible curve ruler to make organic shapes.
The flexible curve is like the handy snake friend of illustration that you never knew you needed. This bendy ruler allows you to make your own custom curvy shapes and trace that shape onto your page. This allows you to create more organic shapes, but also draw it more smoothly. You can also more easily draw that shape multiple times once you’ve formed it—the flexible curve keeps its shape until you change it! One other benefit of the flexible curve is that because it has a ruler on each side, you can also measure shapes that aren’t straight.
I have a 32” long flexible curve made by Alvin, but they come in several sizes ranging from 12” to 40”. You can ask your local art store if they carry them, or if they can order one for you, or you can order one online.
Benefits of the flexible curve:
Make custom organic shapes
Create a smoother curved line than free-hand drawing
Use the shape as a template for creating repeated shapes—the curve keeps its shape until you change it!
Measure lines that aren’t straight.
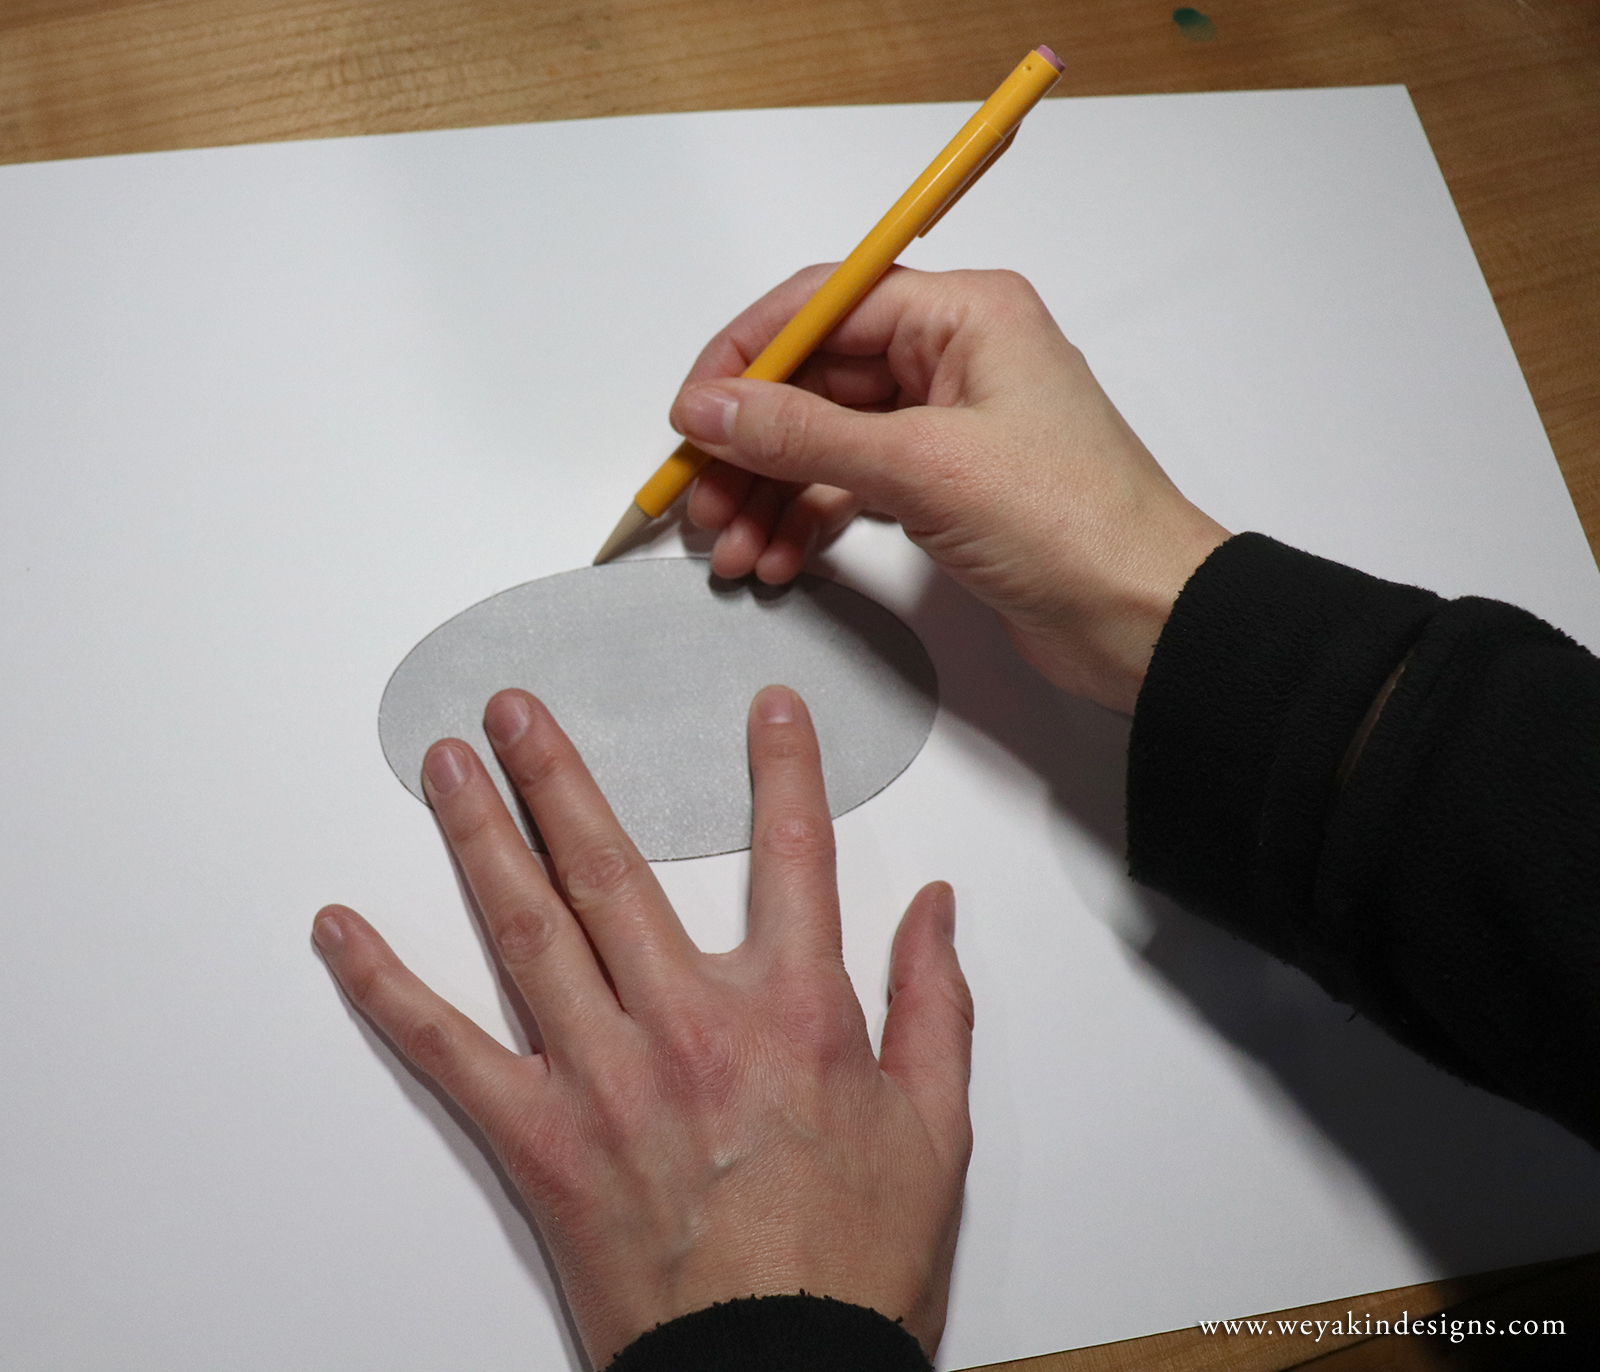
Homemade Templates with Card Stock
Homemade template made from cut card stock paper.
Sometimes I find there’s a shape I need to make that isn’t available with any of my other template tools. I love keeping card stock on hand to make my own custom templates, similar to the templates elementary school teachers make for class art projects. You can free-hand draw your shape and then cut it out so you can repeat that shape by tracing it. Or you can use the computer.
If you want a more precise shape, you can draw your shape on the computer using a program such as Adobe Illustrator or even Microsoft Paint. There are a lot of programs that allow you to make basic shapes. From there, you can print your shape out and then carefully cut it out by hand. Then, you have a handy template you can trace.
Benefits of homemade templates with card stock:
You can make nearly any shape you want
Makes it easy to draw repeated and consistent shapes
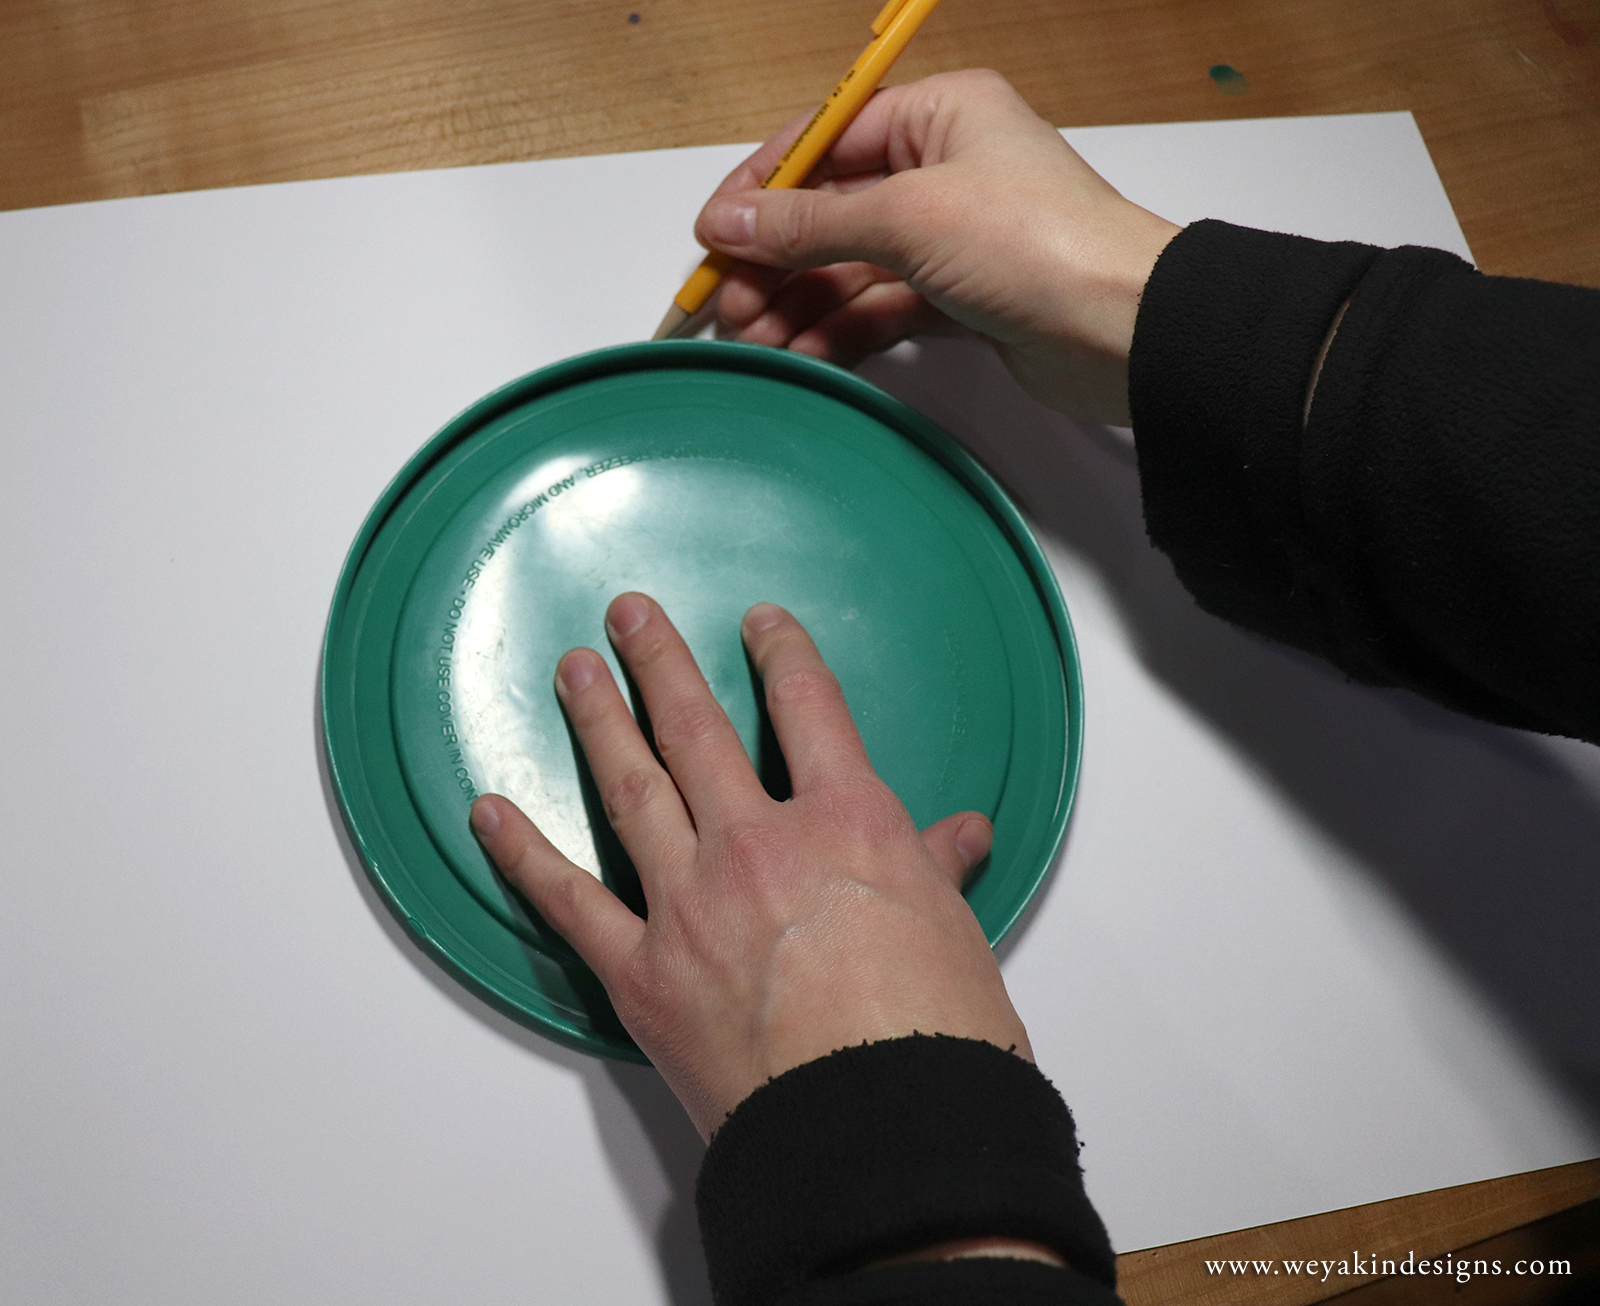
Container Lids
A container lid from the kitchen as a template.
Yes, you read that right. Container lids are one of my templating tools. When I need a shape that I don’t have another tool for, I go to my kitchen and see what I have. I have a lovely set of Pyrex glass dishes in various sizes with lids. Those lids are the perfect circle templating tools when I need a circle larger than my circle maker tool. It’s also something you don’t need to buy and probably already have in your house!
Benefits of container lids:
Cheap and already in your house
Different shapes and sizes that other tools might not provide
Measuring and templating tools are helpful pieces of equipment that can make our lives easier as artists and illustrators. The six tools mentioned above are just some of the many measuring and templating tools available to artists. These are the ones I find myself using the most and I hope you find some of them helpful too. Do you have some other measuring and templating tools you love? I’d love to hear about it! Leave a comment below to share your favorite tools.
Watercolors are a lovely medium and it’s one of my favorites to work in. You can get some interesting layers of textures and colors because of its transparency. It has a great ability for being light and washy, and also deep and detailed. But, as many beginner artists find, working with watercolors can be challenging when your page gets wavy and warps while working on it. There are a few methods for holding your watercolor paper flat on your work surface. In this tutorial, I’ll show you my favorite way to keep watercolor paper flat while I’m working.
Tutorial I: How to Stretch Watercolor Paper
Here is the list of materials you’ll need for this method of stretching watercolor paper:
Preferred watecolor paper (sheets instead of blocks/pads preferred—I am using Fabriano 300lb Hot Pressed)