Matting, Framing, and Wiring Illustrations for Hanging in a Gallery—Video Tutorial

A friend asked me for help on how to frame illustrations for a show. Since I thought it would be helpful for others as well, I put together this video to share how I frame and wire my illustrations. While illustrators aren’t always gallery artists, we do sometimes have the opportunity to show our work in galleries and other exhibitions. It’s important to know how to frame up your pieces for shows and how to wire it properly for hanging.
You’ll often find gallery shows and other events have specific instructions for framing that include “framed and wired for hanging”. It’s important you follow their instructions and make everyone’s lives easier.
This post outlines how to create a hinge mat, frame your piece, and wire the frame to be hung. It applies specifically to flat work on paper, such as watercolors, pen art on paper, digital art printed on paper, etc. If you’re framing pieces painted or printed on canvases or boards, you’ll need to find another framing method.
Watch the Video:
The Steps for Matting, Framing, and Wiring Art for Hanging:
- Gather all of your materials
- Create a hinge mat
- Line up top of cut mat and backing board
- Measure out hinging tape and cut
- Place hinging tape across top inside of backing board and cut mat board
- Flatten tape so it’s smooth
- Fold mat board over onto backing board
- Place art under mat board
- Center art in your cut mat board
- Carefully place photo corners on each corner of the art
- Put art into frame
- Open up frame back
- Clean inside of frame glass (and let dry)
- Place art inside from, face down onto glass
- Be sure your art looks good from the front before closing it up
- Place frame back back into frame and latch into place securely
- Wire the frame for hanging
- Find your desired placement of wire hanging brackets (mark with pencil if needed)
- Hold bracket in place while screwing in screw to secure it
- Repeat on the opposite side
- Measure and cut your wire (leave extra on each end for securing)
- Thread wire through bracket loops
- Secure wire either with crimp tubes (squeeze into place with pliers) or by wrapping around itself until secure
- Clean front of glass
- Label back of your art as necessary according to gallery instructions
Materials List:
- Your art
- A frame appropriately sized for your art
- A pre-cut mat board sized for your art
- Backing board
- Linen hinging tape (archival)
- Photo corners (archival)
- Framing wire, brackets, screws, and optional crimp tubes
- Lens cleaning wipes
- Screwdriver
- Needle nose pliers and wire cutter
- Scissors
Links for Some Items Used in This Video:
- Frames, mat board, and backing board supplies:
- Linen Hinging Tape by Lineco:
https://www.dickblick.com/items/lineco-self-adhesive-linen-hinging-tape-1-14-x-35-ft/ - Archival Photo Corners by Lineco:
https://www.michaels.com/product/lineco-clear-archival-mounting-corners-D287431S - Frame wiring kits:
- From Amazon: https://www.amazon.com/Picture-Hanging-Hangers-Stainless-Paintings/dp/B07RVLV6CY
- From Michaels: https://www.michaels.com/product/picture-hanging-kit—100-feet-stainless-steel-hanging-wire-60-pcs-d-ring-picture-hangers-with-screws-and-60-pcs-aluminum-crimping-loop-sleeve-for-hanging-paintings-photos-316779518340808707
- Zeiss Lens Wipes:
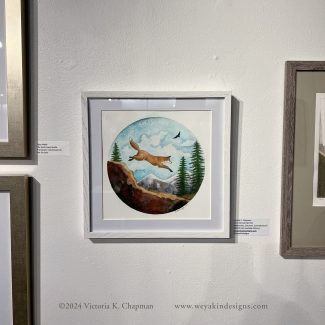
The art being framed in this video is Sierra Nevada Red Fox and is available for purchase. Contact Me to purchase the original (including this frame). You can also buy prints and stickers of this piece in the online art shop.
Feel free to leave your questions or comments in the comment box below. Thanks for watching!
